 |
| Finished product! |
Twine
Hot Glue
Grosgrain ribbon (mine has 1 inch width)
All available at a local HobLob near you.
Ready? Set? Do it yourself.
*Optional, but advised: create a rudimentary prototype out of paper. This will give you a rough idea on visuals.
1) Using a fairly large piece of paper, cut out a circle as desired. (I used a compass and my circle had a 5&1/4 in radius). From the large circle, cut out a smaller circle. (With the compass, my smaller circle had a 3& 3/4 in radius and my large circle had 1&1/4 in of paper all around.) This "large circle" will be the brim. The "small circle" will be the top of the hat.
2) With a long strip of paper, (mine was a 23x2&5/8 in) tape the top of the hat to the strip. Fold in about a half inch over the top of the hat, tape it down, and repeat for about every other inch. There will be odd folds in between because of the fact that it is a circle and the rectangular strip will not cohere to its circular ways. (Don't worry if it looks wonky, its just a pre-DIY to make sure you will have a hat that fits. It would be better to have to start over using paper than the twine, which is much more difficult to work with.) The end result should be a 2& 1/8 inch height.
3) All that's left now is to tape the brim and to cylinder.
4) Try it on. Too small? Add a half inch to all the lengths. Too large? Subtract a half inch. Play around with the measurements as you wish. This prototype will be a relatively accurate same-scale model.
Braided Twine

 |
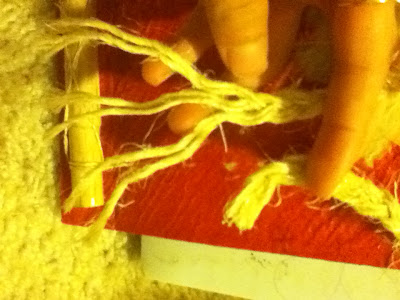
| Braidin' La Twine |
1) Grab the twine and cut about 1 yard strands. One braid will require six strands; I found it much easier doubling up on the twine rather than using single strands for the braid-it speeds up the process.
2) Secure the six strands with a rubber band. Divide six strands into three, with two in each group.
3) Begin braiding. Make sure to fully separate each group as you braid; not separating will result in tangles in the the twine that will interfere with the hot glue process.
4) Finish the braid by putting as many braids in as possible, hold the end between your thumb and forefinger, and hot glue the end tip.
5) Repeat steps 1-4 for multiple braids. You will only need one braid to begin making the hat. Continue with the tutorial, then come back to this part when more braids are needed. The hat is a manipulation of the connected pieces of braid.
Top part of the hat


1) Take a piece of braided twine. Remove the rubber band. (You may need to re-braid a bit of the end where the rubber band held the twine in place). Hold it between your thumb and forefinger and add a little hot glue.
2) While making this part, keep in mind that the top of the hat will be flat. Find a flat surface safe to use hot glue on (I used our wood dining table; the hot glue peeled off quite easily). Place one end of the braid down and secure it with your finger. Hot glue one side of the braid to the end using as little glue possible, making sure to create as little space between twine as you can. Spiral around the oval-ish shape and continue gluing around. It will eventually form a circle shape. You may eventually run out of braid, which is fine. It took me, I believe, around three or four braids to produce a top with my desired diameter. Simply refer to the Braided Twine portion of the tutorial for more braids.
3) To attatch two braids together, you need to finish the one already on the and leave about a 2 inch tail. Hot glue the new braid and the tail of the current one.
*When gluing, keep the glue showing only on one side so that when you peel it off of the surface, there won't be as much glue showing.
Height of the hat
 |
| A stack of braids would look like such for the height. (This isn't attached because it was just an example) |
2) Keep the braids glued tight. When you reach the raised end of where the height started, push it down and in slightly. Glue around and above the raised end.
3) Continue gluing around and adding braids as necessary.
Brim of the hat
1) Upon finishing the height, you can start to glue a brim. Begin by turning the hat over.
2) Then, take the current braid and flatten it against the surface.
3) Glue around the hat similar to the way the top part is made.
4) This part requires about four or five braids.
5) Finish it off by tucking in the end so that it is inconspicuous.
Ribbon
A boater hat isn't complete without the only decoration- ribbon! I made a little bow with mine.
Wrap it around the height and cut more than you think you need- you can always cut off excess.
I wrapped it around, made a bow, and left about 6 inches on both of the tails. I also added a tad of regular Elmer's glue to the ribbon and the height so it wouldn't slip off.
 | ||
-Otakute
No comments:
Post a Comment